| Source Cloud Platform | Destination Cloud Platform |
|---|---|
vCenter
| ZStack Cloud Private Cloud
|
In this scenario, you will add a compute node prepared in the destination cluster as the V2V conversion host.
On the main menu of ZStack Cloud, choose . On the V2V Conversion Host page, click Add V2V Conversion Host. Then, the Add V2V Conversion Host page is displayed.
 Note: The type of the V2V conversion host must be consistent with that of the source platform you selected when you create a V2V job.Note: A host cannot be used as a V2V conversion host for both the VMware platform type and the KVM platform type at the same time.Note: During the V2V migration, the VM system and data are first cached in the V2V conversion host and then imported into the target primary storage.Note:
On the main menu of ZStack Cloud, choose . On the V2V Migration page, click Create V2V Job.Then, the Create V2V Job page is displayed
The V2V job name must be 1 to 128 characters in length and can contain Chinese characters, letters, digits, hyphens (-), underscores (_), periods (.), parenthesis (), colons (:), and plus signs (+).
Note: Note: cmd-->“powercfg -h off”cmd-->“powercfg -h on”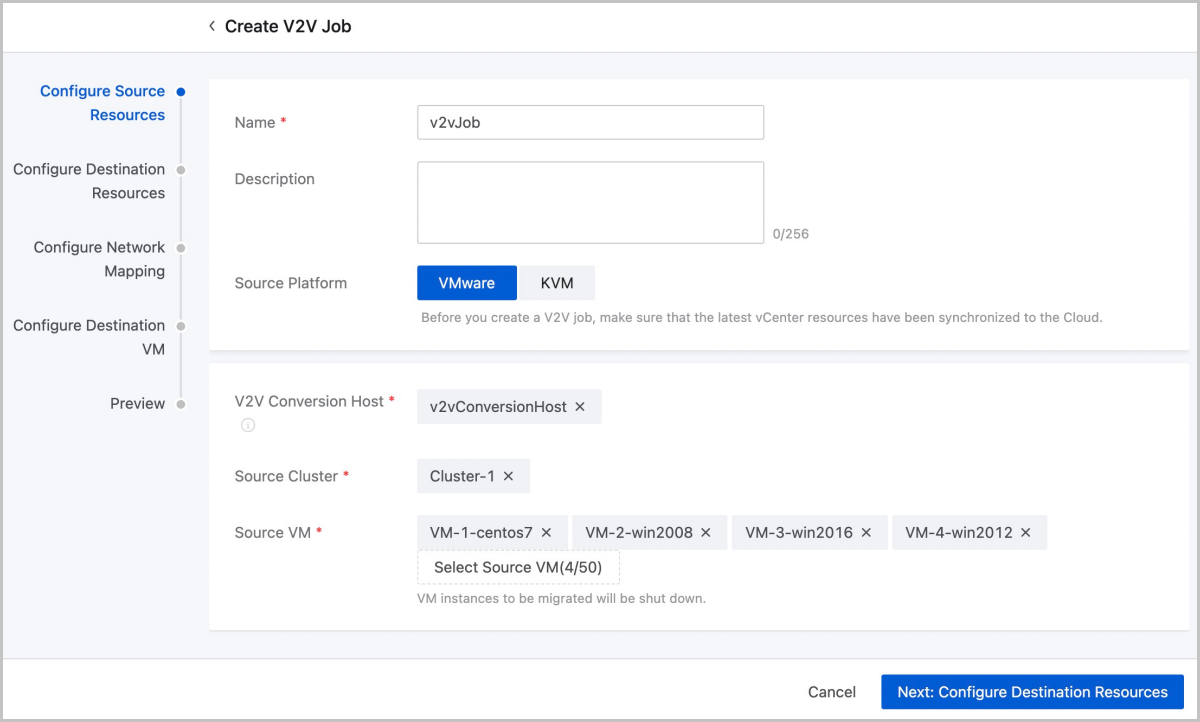 Note:
Note: 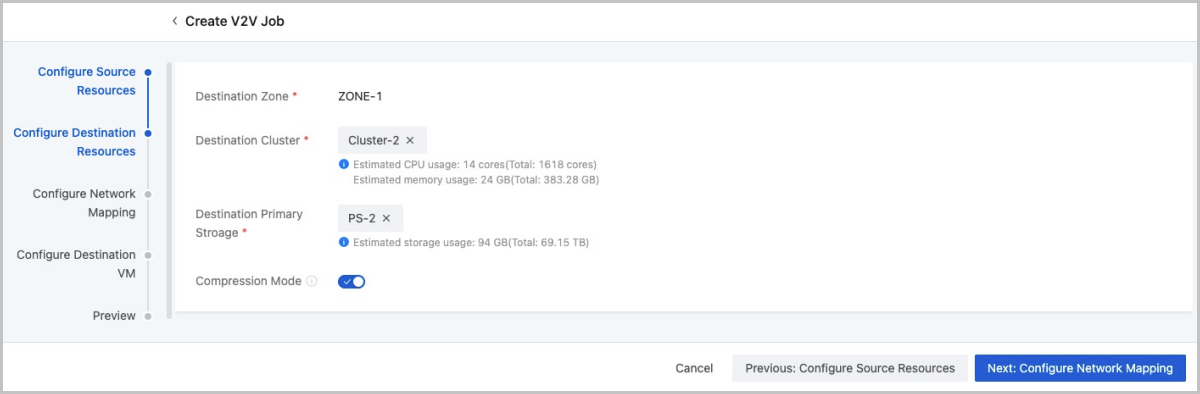
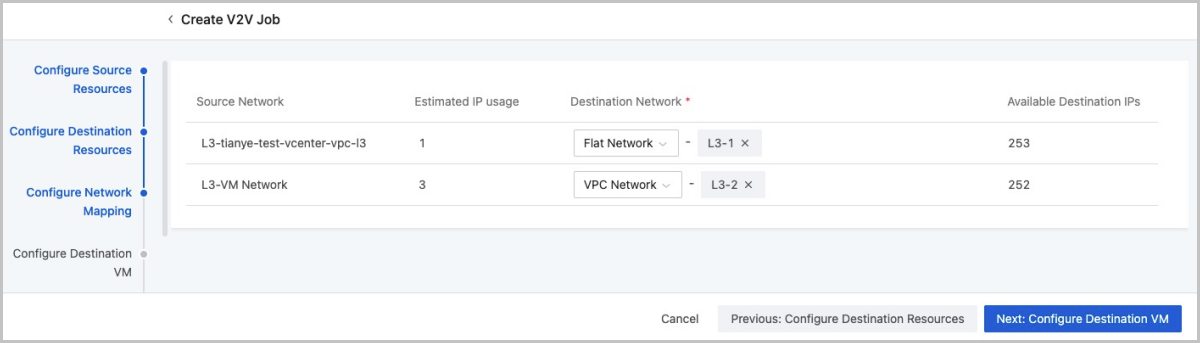
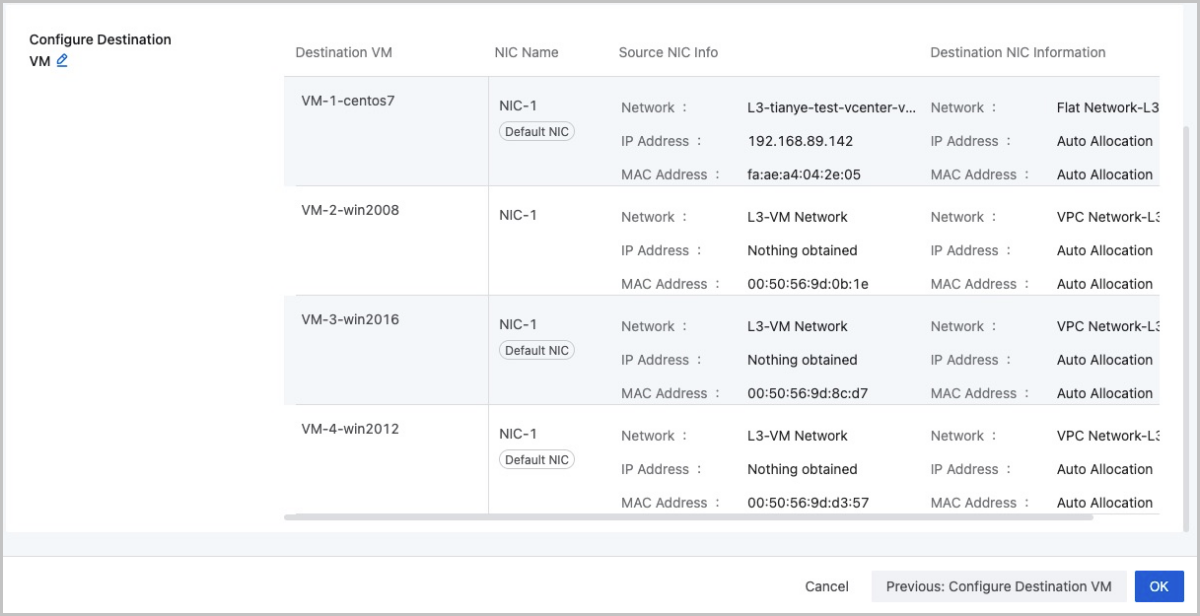
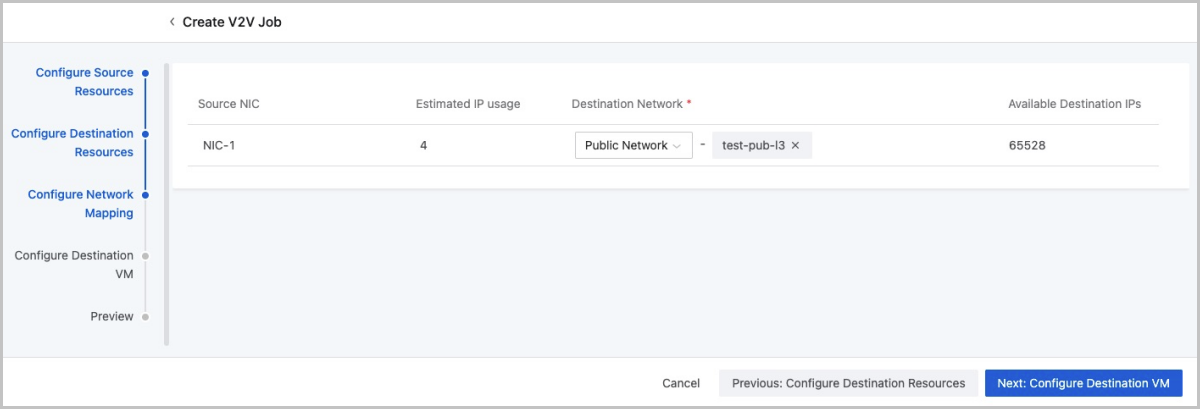
In this scenario, all the chosen VM instances have a NIC attached.
Parameters of the destination VM instances are configured by the system by default. Therefore, go to the next step if no further modification is needed.
Note: Note: If not configured, the IP address of the destination NIC will be allocated by the system.Note: If not configured, the MAC address of the destination NIC will be the same as that of the source NIC after migration.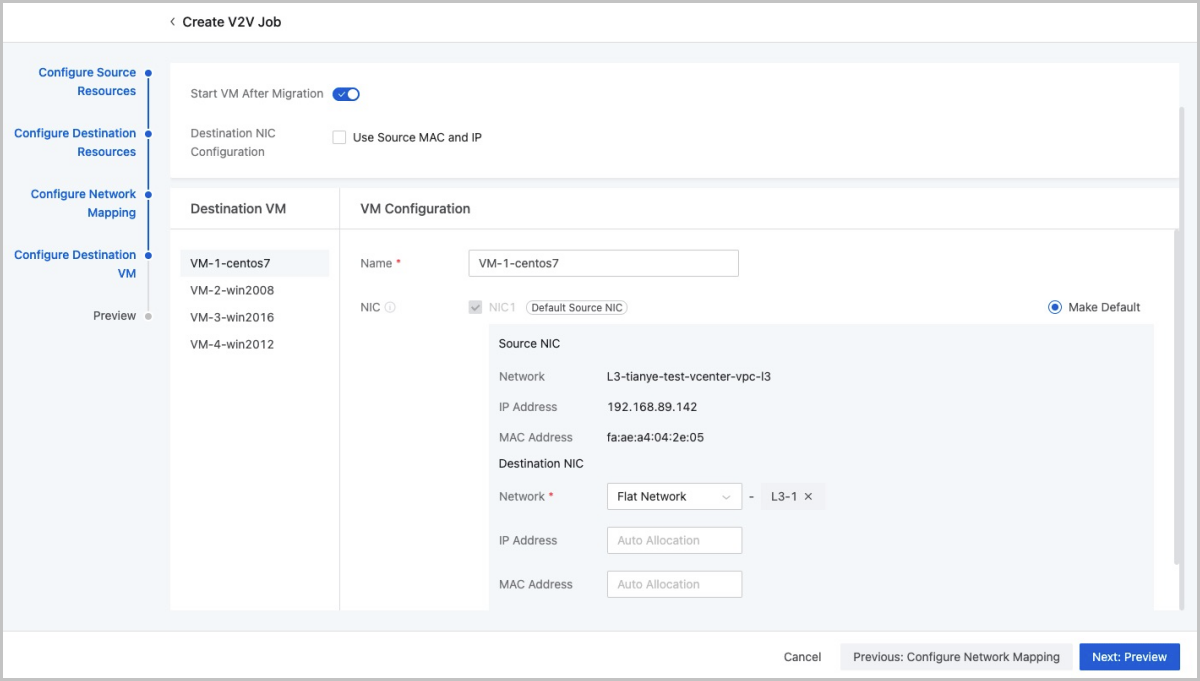
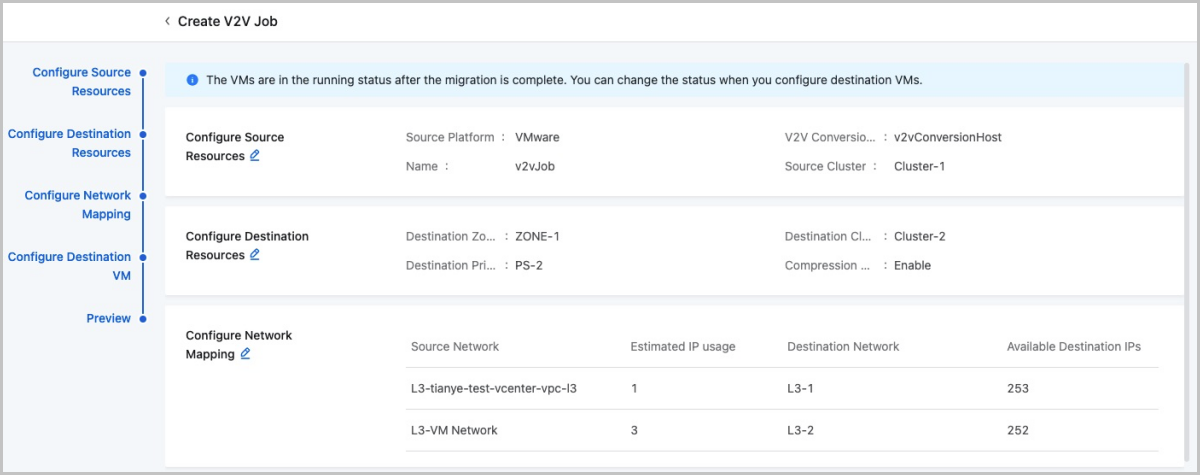
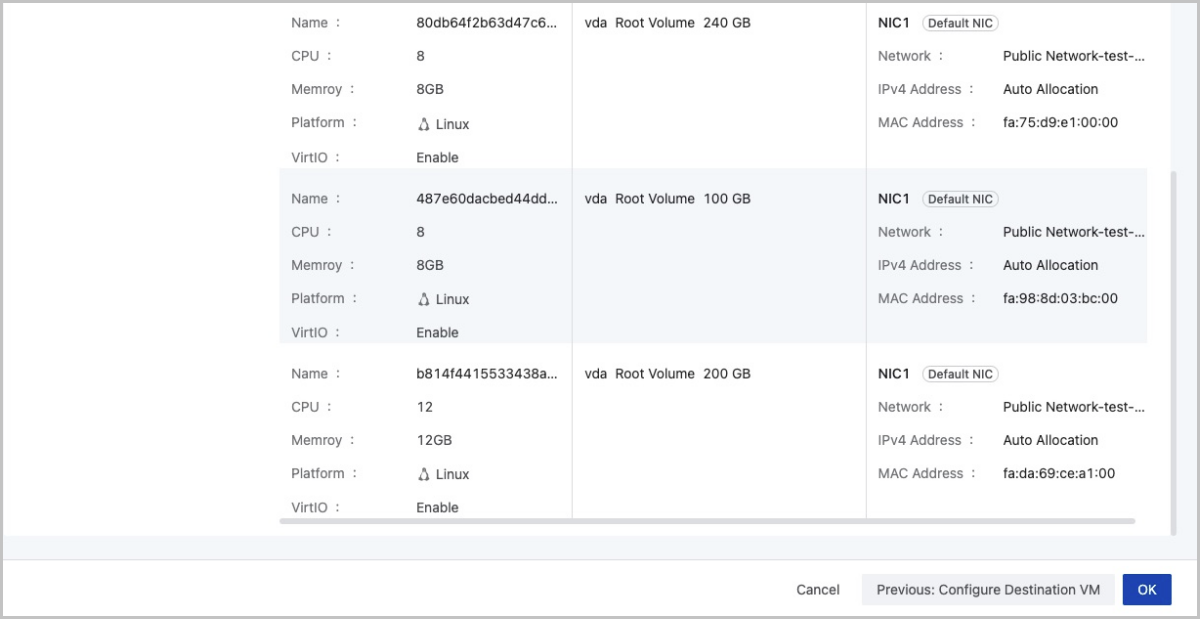
Confirm the information about the V2V job. You can modify the information by clicking the Edit icon next to each step.
| Source Cloud Platform | Destination Cloud Platform |
|---|---|
An open-source, KVM-based cloud platform
| ZStack Cloud Private Cloud
|
In this scenario, you will add a compute node prepared in the destination cluster as the V2V conversion host.
On the main menu of ZStack Cloud, choose . On the V2V Conversion Host page, click Add V2V Conversion Host. Then, the Add V2V Conversion Host page is displayed.
Note: The type of the V2V conversion host must be consistent with that of the source platform you selected when you create a V2V job.Note: A host cannot be used as a V2V conversion host for both the VMware platform type and the KVM platform type at the same time.Note: During the V2V migration, the VM system and data are first cached in the V2V conversion host and then imported into the target primary storage.Note: 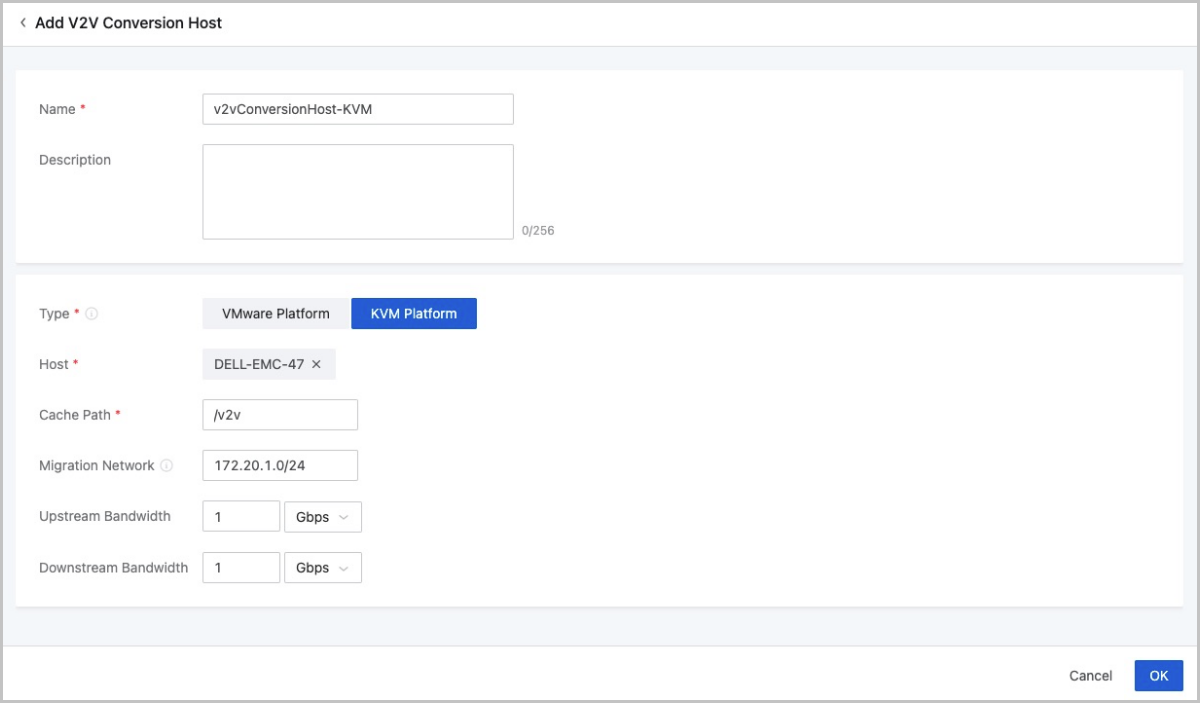
On the main menu of ZStack Cloud, choose . On the V2V Migration page, click Create V2V Job.Then, the Create V2V Job page is displayed
Note: 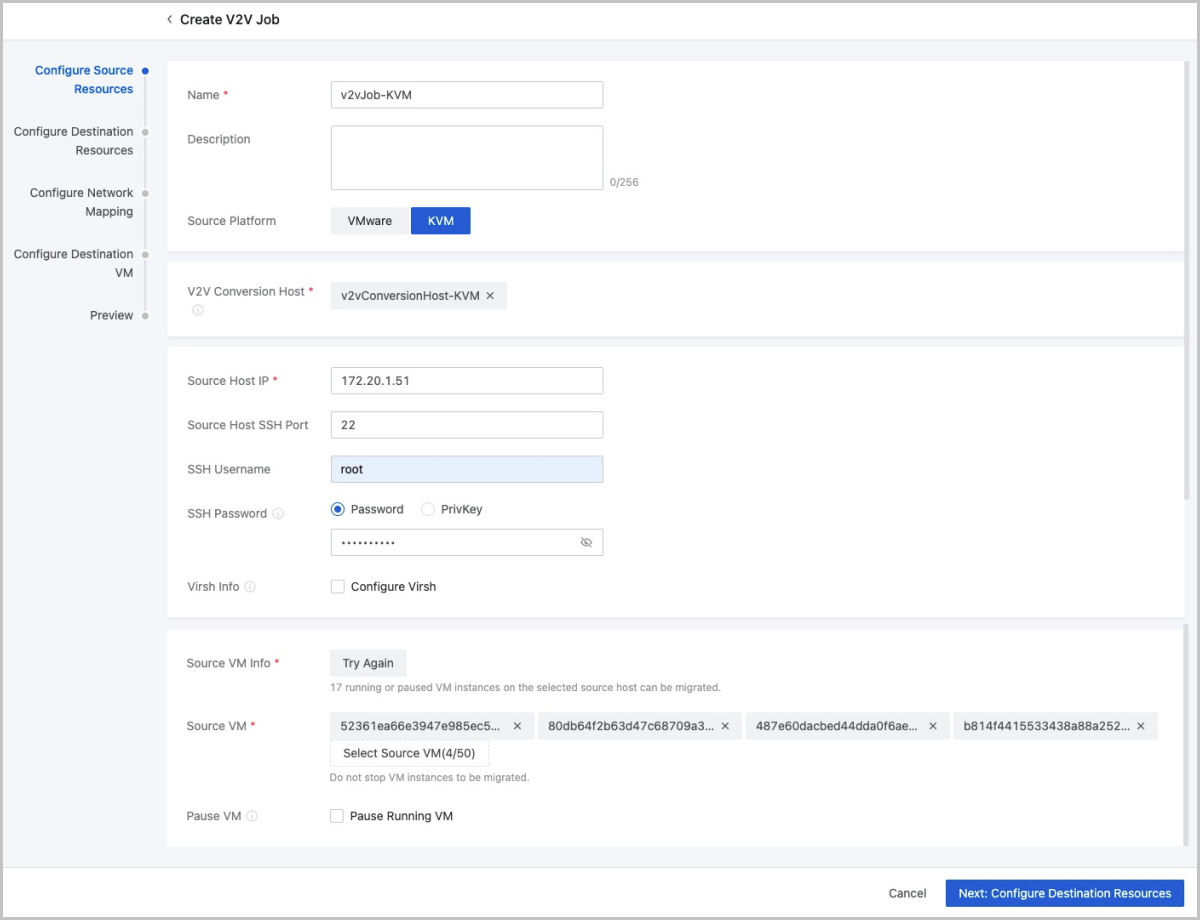 Note:
Note: 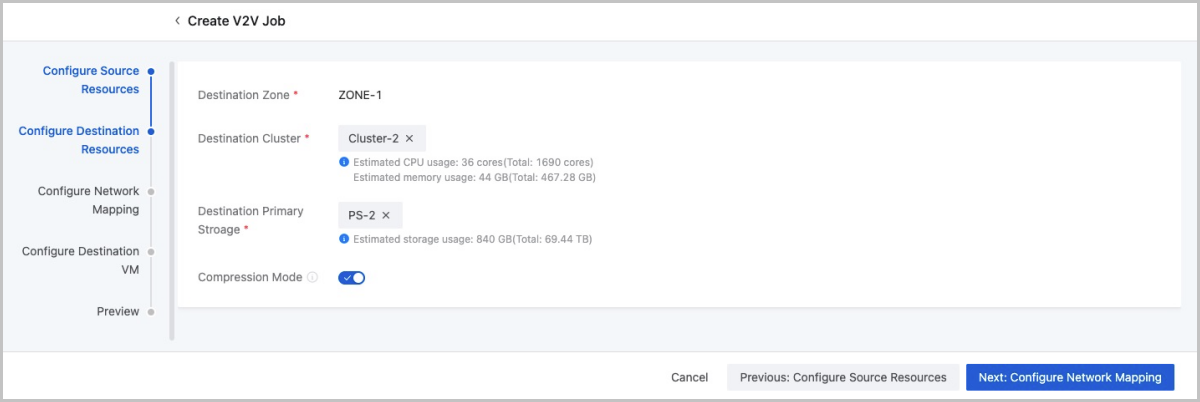
In this scenario, a chosen VM instance does not have a NIC attached.
Go to the next step to manually configure the destination NIC.
 Note: If not configured, the IP address of the destination NIC will be allocated by the system.Note: If not configured, the MAC address of the destination NIC will be the same as that of the source NIC after migration.Note: Before you migrate a VM instance to the current cloud, make sure that the VM instance has at least one NIC attached.
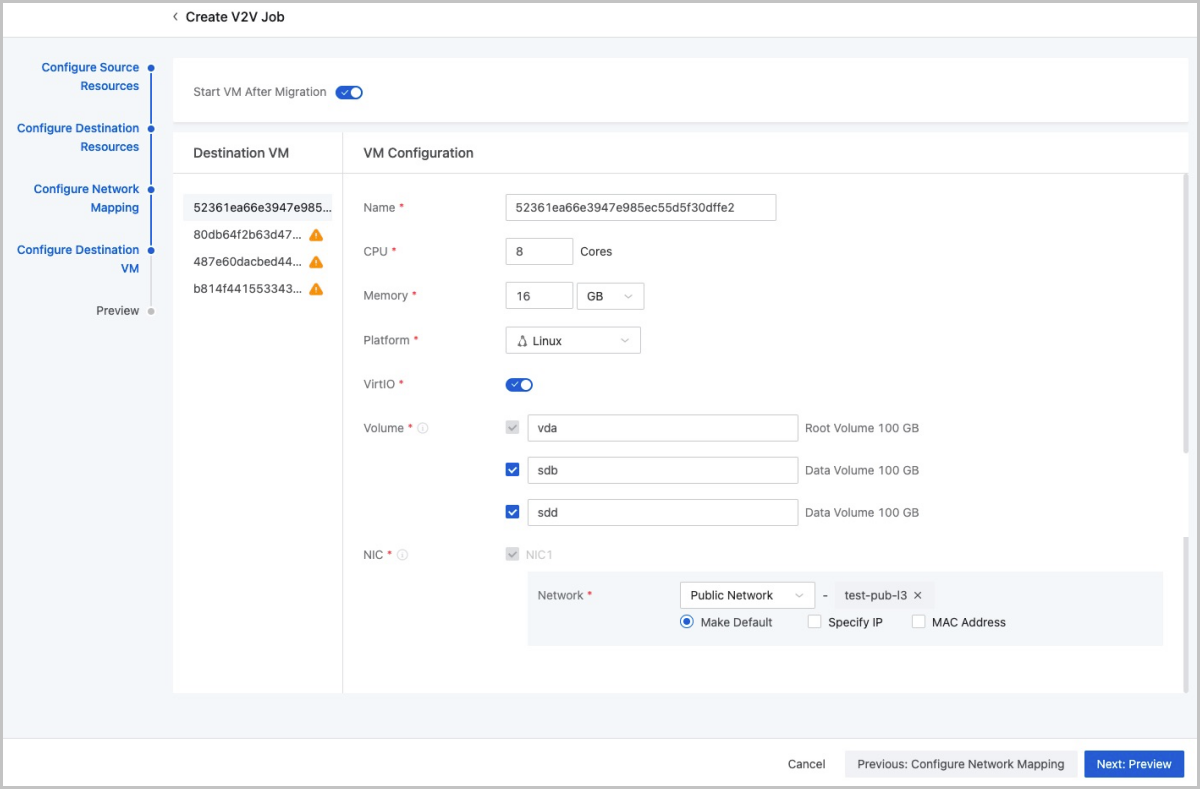
Confirm the information about the V2V job. You can modify the information by clicking the Edit icon next to each step.

Email Us
contact@zstack.ioEmail Us
contact@zstack.ioThe download link is sent to your email address.
If you don't see it, check your spam folder, subscription folder, or AD folder. After receiving the email, click the URL to download the documentation.Thank you for using ZStack products and services.
Submit successfully.
We'll connect soon.Thank you for choosing ZStack products and services.

