Volume Operations
Definitions of volume operations are as follows:
- Create Volume: Create a new volume from a disk
offering.
- A normal volume can be created from a disk offering or a volume image.
- A shared volume can be created from a disk offering, and supports Ceph primary storage and thick provisioned Shared Block primary storages. Except for the preceding primary storages, other primary storages are not supported currently.
- Enable: Enable a volume that is in the stopped state.
- Disable: Disable a volume.
- Attach: Attach the volume that acts as a data volume to a
specified VM instance.
- Assume that your primary storage is LocalStorage. If you want to attach a volume that has been detached from a VM instance, make sure that this volume and target VM instances are on running the same host. If this volume and these target VM instances are not running on the same host, migrate this volume and these target VM instances to the same host.
- Detach: Detach a volume from a VM instance.
- Migrate: Migrate a volume to
other compute nodes.
- Volumes can be migrated according to the workloads of the target compute
node.
- On the list of the recommended target compute nodes, you can sort the order of these compute nodes according to the average CPU utilization or memory utilization. By default, memory utilizations are sorted from low to high.
- If the size of your compute nodes in a cluster is relatively large, you can sort orders for the compute nodes by selecting Top20 or Top50.
- The volume migration operation is only applied to LocalStorage primary storages.
- Volumes can be migrated according to the workloads of the target compute
node.
- Bind Tag: Bind tags for a volume.
- Statements on binding tags:You can select one or more volumes, and click Bind Tag to enter the tag binding page, as shown in Bind Tag. Then, select one or more tags, and then click OK to bind tags for volumes.
Figure 1. Bind Tag 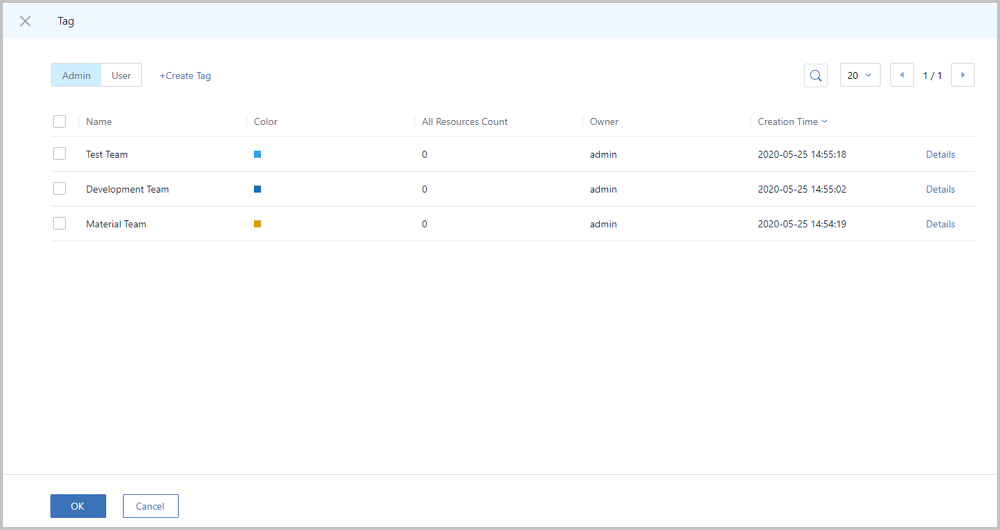
- Resource tags can be sorted in order according to the
creation time or tag names. By default, resource tags are
sorted by tag names. You can change the sort order of tags
in the global settings.
 Note:
Note:
- The sort order priority based on tag names: character, number, Chinese, and case-insensitive English characters.
- After a historical version (3.4.0 and later versions) is upgraded to the latest version, resource tags will be sorted according tag names by default.
- Resource tags can be sorted in order according to the
creation time or tag names. By default, resource tags are
sorted by tag names. You can change the sort order of tags
in the global settings.
- Statements on binding tags:
- Unbind Tag: Unbind tags from a volume.
- Statements on unbinding tags:You can select a volume, and click Unbind Tag or enter the unbinding tag page, as shown in Unbind Tag. Then, select one or more tags to click OK to unbind tags from the volume.
Figure 2. Unbind Tag 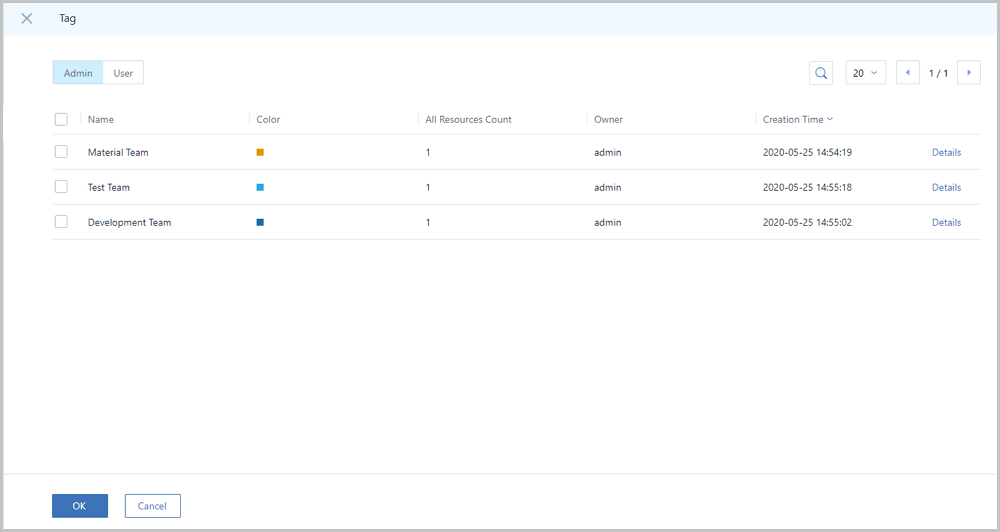
- You can switch to the admin tag list or user tag list by clicking the switch button at the upper left.
- Tag searches and custom displays are supported. You can click the search button at the upper right, choose to display the tag count for each page by clicking on the list count, and click the page flip button to turn pages.
- You can check the detailed information about the tag by clicking Details at the right.
- Admin tags are created and owned by administrators (admins or platform admins), while tenant tags are created and owned by tenants (regular accounts or projects).
- Tags created by tenants can only be bound to resources of the corresponding tenants, while admin tags can be bound to all of your resources.
- Administrators can unbind or delete tenant tags.
- Tags in a project are owned by the project. Therefore, all members, including the head of project, project administrator, and project member, can perform operations on these tags.
- Currently, tag owners cannot be changed.
- When you change a resource owner, all tenant tags bound to the resource will be unbound. However, the admin tags are not affected.
- After the Cloud is upgraded seamlessly, the existing tags will be updated accordingly and displayed in the latest way. If an exception occurs, refresh your browser or create a new tag.
Note:
- Multiple tags on a single resource can be unbound simultaneously. In addition, multiple resources on a single tag can also be unbound simultaneously.
- A tenant can only unbind tags from the resources owned by the tenant itself, while an administrator can unbind tags from all resources.
- Statements on unbinding tags:
- Create Backup: Create a backup for a volume.
- Before you create a backup for a volume, make sure that the volume is attached to a VM instance that is in the running state.
- You can create a full backup for a volume. If you do not select the full backup checkbox, an incremental backup will be created for the volume.
- Recover: Recover a volume backup locally.
- Remote Sync: Synchronize a volume backup to the specified remote backup storage.
- Delete: Delete a volume backup.
- Create Volume Image: Create an image for the current
volume. This image can be used to create new volumes.
- A volume image can be created. In addition, a volume on a Ceph primary storage can be used to create a volume image to an ImageStore backup storage.
- Before a shared volume on a Shared Block primary storage is used to create a volume image, stop all VM instances that are running on this shared volume in advance.
- Create Volume Snapshot: Before making important
operations, temporarily retain the root volume or data volume at a specific
point in time to facilitate rollback on failure.
- A snapshot can save all data of the current volume. You can use a snapshot to quickly recover the state of the volume to a historical state.
- If you create a snapshot for a volume for the first time, you will take some time to store your snapshot.
- In a production environment, we recommended that you limit the number of snapshots per disk within 5. Excessive snapshots might affect the I/O performance, data security, and primary storage capacity of the corresponding VM instances and volumes. For long-term backups, we recommend that you use disaster recovery related services.
- Currently, you cannot create snapshots for shared volumes.
- The snapshot of the volume on the Ceph primary storage does not occupy capacity. Therefore, the displayed snapshot capacity is the real capacity of the volume when the snapshot was created.
- For Ceph primary storages, the volume snapshot capacity might
fail to be obtained. Here are some statements:
- Open source Ceph (version H) and enterprise-level Ceph (earlier than 3.2.0) cannot obtain volume snapshot capacity.
- Due to the RBD format, enterprise-level Ceph (3.2.0 and later versions) may fail to obtain VM snapshot capacity.
- Recover: Recover volume data to the specified time point
when the snapshot was created.
- Before you recover a volume snapshot, stop the VM instances to which the volume is attached, or detach the volume from the associated VM instances.
- Statements on performing volume snapshot:
On the Volume Snapshot page, select a volume snapshot that you need to recover, and choose to recover the data to the specified time point when the snapshot was created.
- Delete: Delete a volume snapshot that you do not need.
- Snapshots created on local storage, NFS, SMP, and Shared Block storages have a tree structure. Deleting the root snapshot will also delete snapshots on the branches and detach the batch snapshots on the branches. Please exercise caution.
- Snapshots created on the Ceph shared storage are independent and do not have a tree structure. Deleting a snapshot will not affect other snapshots.
- When you delete snapshots in a tree structure in bulk, the cloud automatically calculates and deletes the candidate snapshots and cascades the delete operation to the associated snapshots.
- If the snapshots to be deleted contain batch snapshots, deleting the current snapshot will also delete the snapshots on the branches. After being deleted, the associated batch snapshots cannot be recovered. Please exercise caution.
- Statements on deleting volume snapshot:
To delete a volume snapshot, go to the Volume Snapshot page, select one or more volume snapshots, and choose .
- Set Volume QoS: Set the volume bandwidth limit by
configuring the total bandwidth or read/write bandwidth.
- By default, the volume QoS is unlimited. If you do not set the volume QoS on your disk offering, a normal account or project member can randomly set QoS for the volume.
- If you set the volume QoS on your disk offering, a normal account or project member can set QoS for the volume. However, the QoS limit that you will set must not exceed the QoS limit stipulated by the disk offering.
- The QoS limit method set by a normal account or project member cannot be changed, and is consistent with the original QoS limit method (total bandwidth or read and write bandwidth).
- Cancel Volume QoS: Cancel the volume QoS. After the
cancellation, the volume QoS is unlimited.
- By default, the volume QoS is unlimited. If you do not set the volume QoS on your disk offering, a normal account or project member can cancel QoS for the volume.
- If you set the volume QoS on your disk offering, a normal account or project member cannot cancel QoS for the volume.
- Change Owner: Change the owner of a volume.
- If you change the owner for a volume, all the preceding user tags will be unbound without affecting admin tags.
- Resize Volume: Resize a root volume or data volume when a
VM instance is in the running state or stopped state.
- The resizing operation only increases the volume size, and the increment cannot be smaller than 4MB. The new size takes effect immediately.
- If you create a shared volume on a Shared Block primary storage, you cannot resize this shared volume.
- If you create a shared volume on a Ceph primary storage, before you resize the shared volume, make sure that this shared volume is not attached to any VM instance, or the VM instances to which the shared volume is attached is stopped.
- The resizing operation will trigger automatic snapshot creation for this data volume to ensure the data security.
- Storage Migration: Support volume migrations between
primary storages of the same type, for example, migration across Ceph primary
storages, across NFS primary storages, and across Shared Block primary
storages.
- Migration across Ceph primary storages:
- Volumes to be migrated across Ceph primary storages cannot be attached to any VM instance.
- Shared volumes that are not attached to VM instances can be migrated across Ceph primary storages. However, shared volumes that have been attached to VM instances cannot be migrated across Ceph primary storages.
- To migrate between two Ceph primary storages, make sure that the Ceph MON nodes between these two Ceph primary storages are interconnected.
- Migration across NFS primary storages:
- Volumes that are migrated across NFS primary storages cannot be attached to any VM instance.
- To migrate volumes between two NFS primary storages, make sure that the destination NFS primary storage can be attached to the cluster of the volumes to be migrated.
- Migration across SharedBlock primary storages:
- Volumes on SharedBlock primary storages can be attached to VM instances that are in the stopped state and migrated across SharedBlock primary storages.
- Shared volumes that are not attached to VM instances can be migrated across SharedBlock primary storages. However, shared volumes that are attached to the VM instances cannot be migrated across SharedBlock primary storages.
- To migrate volumes between two SharedBlock primary storages, make sure that the destination SharedBlock primary storage can be attached to the cluster of the volumes to be migrated.
Note:
- After volumes are migrated successfully, the original data (trash) is saved to source primary storage. You can check the data on the Clear Data tab page of the details page of the source primary storage.
- The Clean Up operation is supported. When you confirm the data integrity after storage migration, you can click Clean Up to manually clean up the original data. After you clean up the trash, you cannot recover the original data any more. Please exercise caution.
- Migration across Ceph primary storages:
- Delete: Delete a volume. After you delete the volume, the
volume will be displayed on the Deleted tab page.
- If you delete a volume, you will detach the volume from associated VM instances, which will interrupt the data reading and writing process. Please exercise caution.
- Recover: Recover a deleted volume. The recovered volume will be displayed on the available tab page.
- Expunge: Completely delete a volume.
- Scheduled Job: Create a scheduled job for a volume. A volume scheduled job can be used to create snapshots for a disk volume on schedule.
- Search: Search for a volume by its name, UUID, and owner. You can also use the advanced search method.